Find out how to dissect flowers and learn about their structure with this simple hands-on dissection activity and other exciting plant experiments for kids. Dissecting a flower is a great way to visually show the different parts of a flower, which can be hard to picture from a diagram in a book.
What you need to dissect a flower
Any flowers with large parts work well, for example:
- Lily
- Iris
- Daffodil
- Tulip
Paper plates or sheets of cardboard
Magnifying glass – optional
Tweezers
Scissors
How to dissect a flower
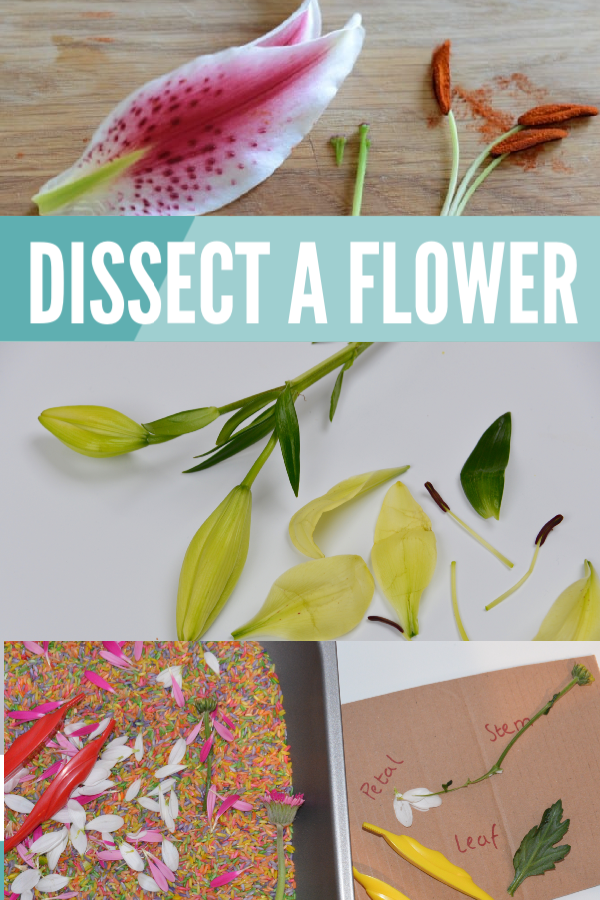
Lay a flower out over a paper plate, tray or sheet of cardboard. Try to identify the different parts.
Label areas of the different parts of a flower on the piece of cardboard or paper plate and match the dissected pieces to the correct label.
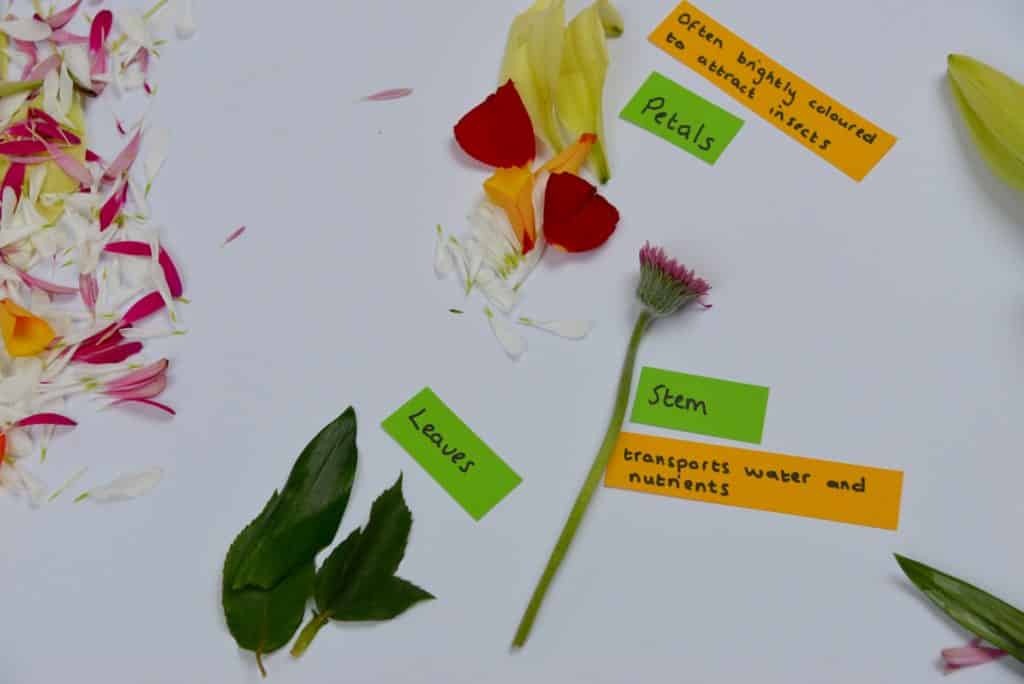
Try to find the following flower parts:
Root – carries water and nutrients from the soil to the plant and keeps it anchored in the ground.
Petal – often brightly coloured to attract insects.
Leaf – uses energy from sunlight for photosynthesis, creating oxygen and sugars for the plant to use for energy.
Pollen is a fine powdery substance containing male reproductive cells. The anthers of seed-bearing plants produce pollen.
Stem – a plant stem transports water and nutrients from the soil to the rest of the plant. The stem supports the leaves and flowers, allowing them to be raised above the ground to be in the light.
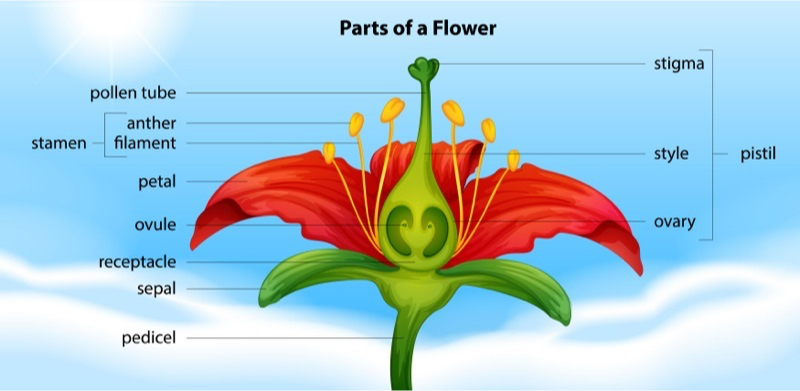
Flower Dissection Challenge
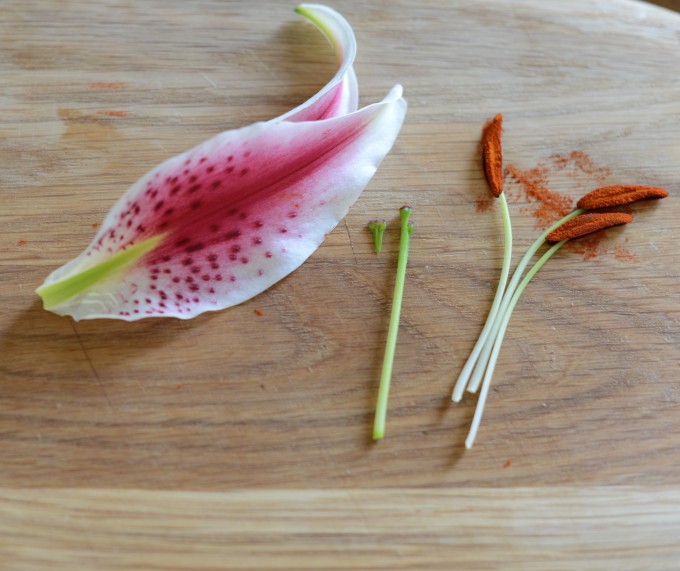
Try to find a stigma, anther, ovule, and ovary. A lily is a good flower for identifying these parts.
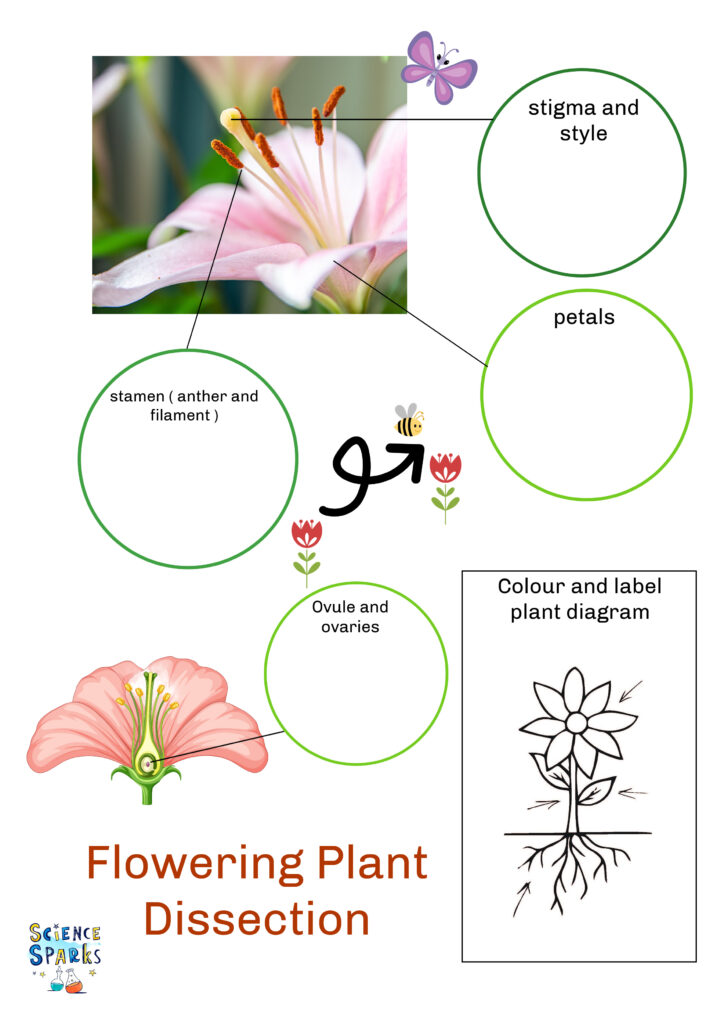
What is pollination?
Pollination is when pollen from the anthers ( male part ) of one plant lands on the stigma (female part ) of a plant of the same type. The stigma is sticky so that the pollen can attach to it easily.
Pollen can be carried by wind or insects. Once it has landed on the stigma of a plant, it travels down a tube where it fertilises the ovules, which then become seeds.
What is Fertilisation?
Fertilisation is when the male cells from the pollen connect with female cells from the ovules.
What is germination?
Germination is when a seed starts to sprout and grow. One way to demonstrate this is to grow a bean in a jar to discover the conditions needed for a seed to germinate.
Which are the best flowers to dissect?
Anything with large parts works well. Lilies are great, but watch out for pollen stains. Tulips, daffodils, and iris flowers also work well.
More Plant Science Experiments
Find out why leaves change colour in Autumn.
Build a plant growth model from LEGO.
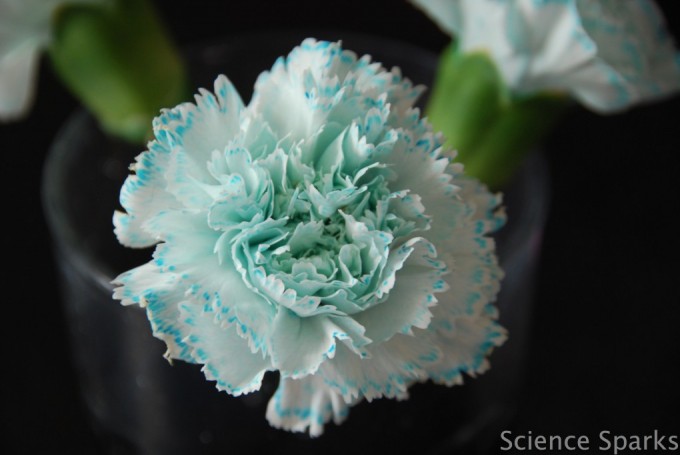
Learn about transpiration using white flowers and food colouring. The colour of the petals will change as the food colouring is transported up the stem and into the petals.
Try growing new plants from tissue cuttings.
Have a go at growing a multi coloured cress caterpillar. Can you guess how we made the leaves different colours?
Create a 3D model of a flower showing the different parts.
Learn about transport in plants with a capillary action science activity.
Can you think of any more plant experiments for us?
Suitable for Key Stage 1 Science
Plants
Identify and describe the basic structure of a variety of common flowering plants, including trees.
Observe and describe how seeds and bulbs grow into mature plants
Find out and describe how plants need water, light and a suitable temperature to grow and stay healthy
Key Stage 2 Science
Identify and describe the functions of different parts of flowering plants
Last Updated on April 14, 2025 by Emma Vanstone

Oh I just love these ideas Emma
Oooh.. this reminds me of a science experiment we used to do when we were kids. We did exactly the same thing except we used Hibiscus because they were plentiful at home (but exactly the same idea, it’s much easier to identify the parts).